


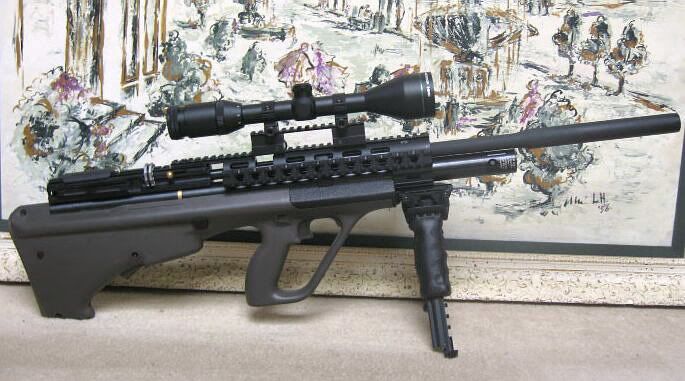
Hatsan AT44 bullpup internal cocking conversion (AUG Air)
This is the quick repeat shooting 1970’s designed Steyr AUG bullpup mod for Hatsan AT44 (actual airgun model is Hammerli Pneuma Elite10 0.22cal), changing side lever cocking to front lever (like Winchester lever) cocking internally, in order to keep aiming and repeat shooting. This cocking conversion may use for pump-action or front side lever-action cocking. Also AUG stock has its safety, you may remove the original safety. The modified 3pcs-hammer has 3-tiny balls (like Webley Raider), which makes less cocking effort and very smooth cocking operation.
It has the step-by –step 3- modifications; AUG stock mode, cocking (internal link) mod, and shroud mod.

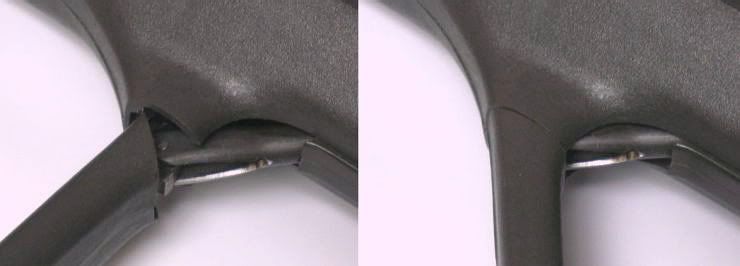
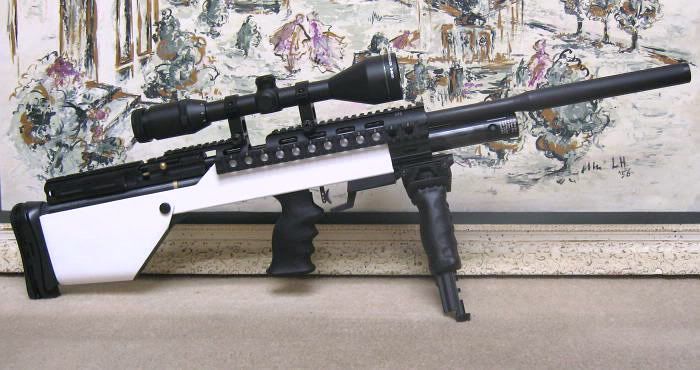
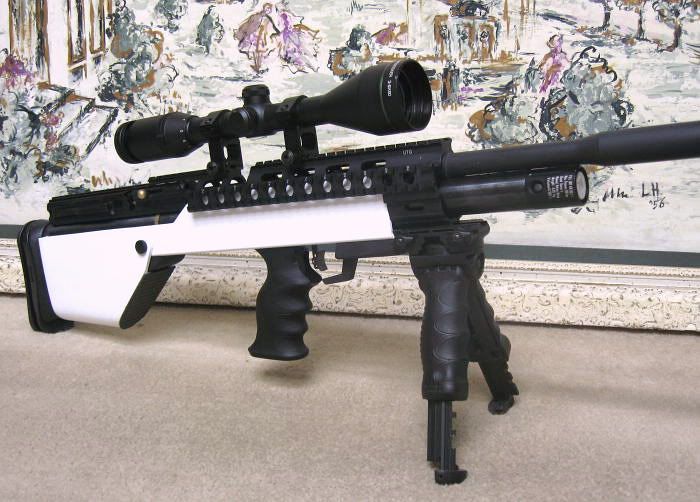
After cocking mod (Front lever-action)

Before cocking mod (Rear side lever-action)
First, you need to get a used or brand new Steyr AUG stock (real AUG stock or airsoft AUG stock). If you like real AUG stock which is made of military spec polymer, you can get used or brand new AUG stock. Below is the real AUG stock (NATO version) seller:
http://www.cdnninvestments.com/staugmcostne.html
If you like airsoft AUG stock, you may get AUG stock of JG/Classic Army/Aftermath/Echo1/Tokyo-Marui/JAC and others.
The total cost depends on the cost of AUG stock, the cost of other material is not considerably high, except for RIS or scope mount. I got airsoft AUG stock at the local garage sales at $30, this is JAC made airsoft, made of fiberglass contained polymer. Finding used AUG stock will be the key to save mod cost. Below is my total material cost; I have tools and some misc. parts in my junk-box, so the mod material cost was about $100-110, in addition to PCP rifle ($290).
Airsoft Steyr AUG stock: $30
RIS (scope/sight mount): $40
Aluminum Steel tube/bar/plates/blocks: $25
Screws, misc.: $7
Hammerli Pneuma Elite10: $290 at
http://www.bigsupplyshop.com/Umarex-USA-Hmmerli-Pneuma-Elite10-22plt-2251015_p_21815.html
Evanix Max will be the alternative choice, but the estimated sales price is $1770.
Procedure:
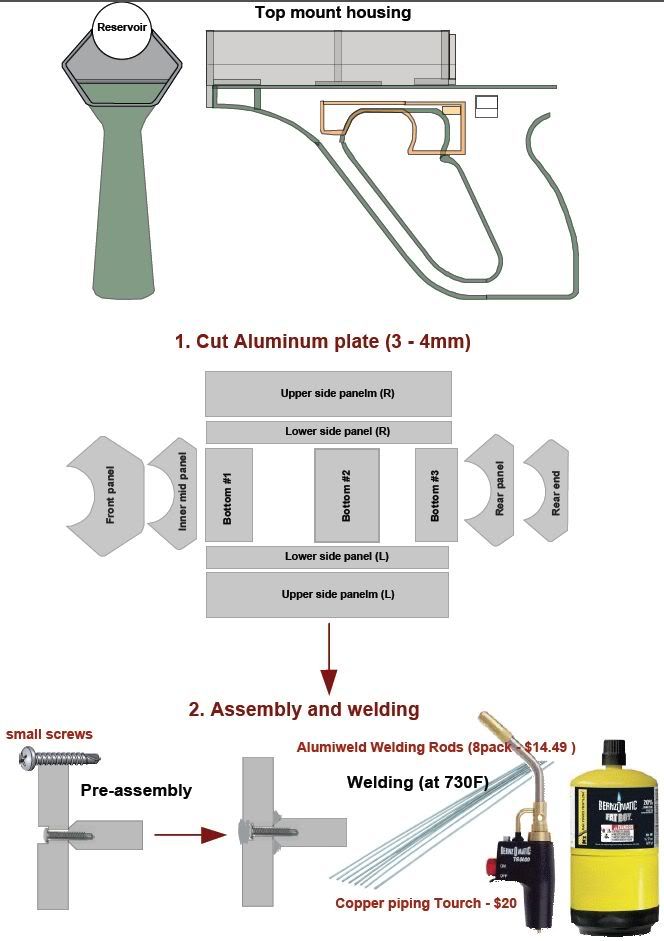
This is easy way to make Top mount housing (Aluminum version) for AUG Bullpup (Plastic and wood will be alternative material choices.).
First, cut Aluminum plate as below; then, assemble the plates with tiny screws as temp-assembly. Second, welding all connection area by Aluminum welding (working around 730F) rods and copper piping touch (see below Youtube for welding):
http://durafix.com/
Aluminum welding rods are available from various makers at around one (pack) – $15 – $25, and copper piping touch is about $20 at hardware stores.
http://www.harborfreight.com/pack-of-8-alumiweld-aluminum-welding-rods-44810.html
Then, filing and sanding unwanted area, the rest of finishing/painting process are same as usual aluminum finish.
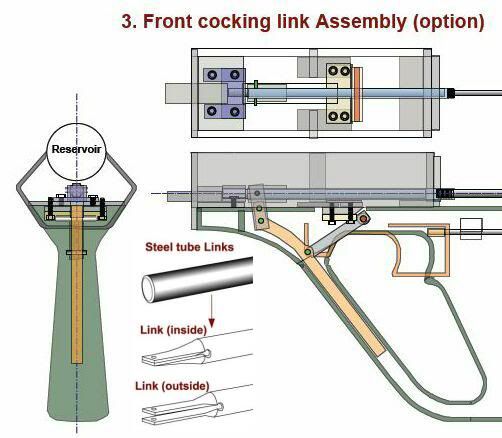
Last, I added front cocking-assembly, just like Add-on module to Top mount housing.
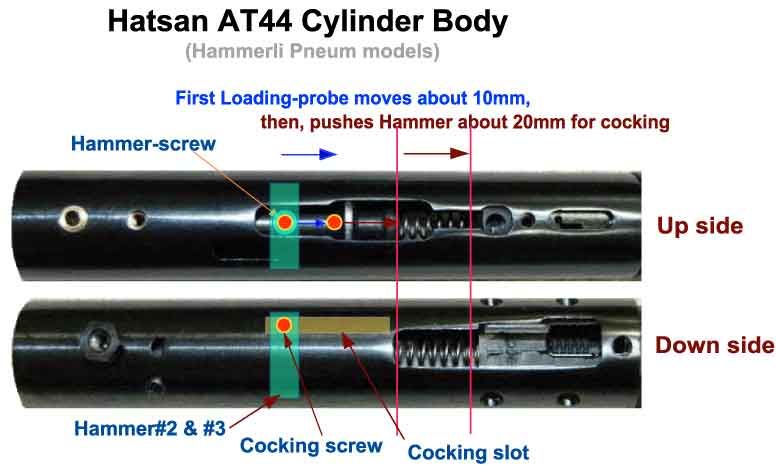
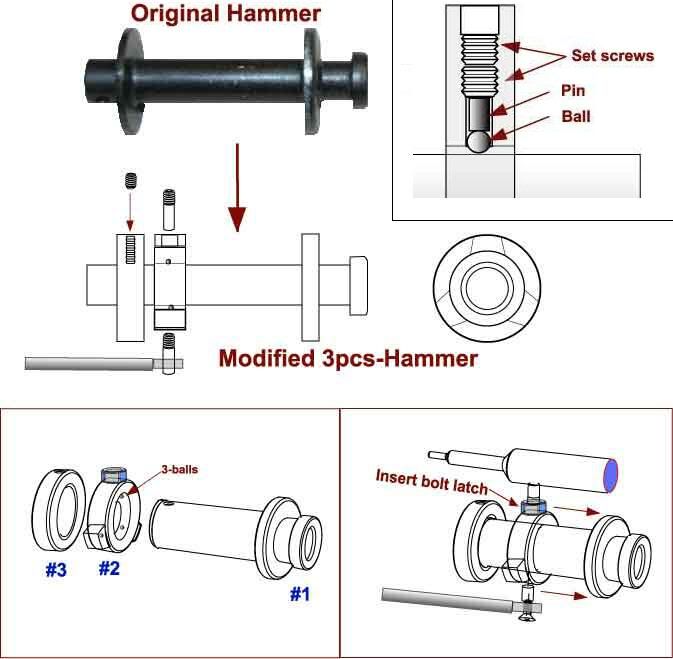
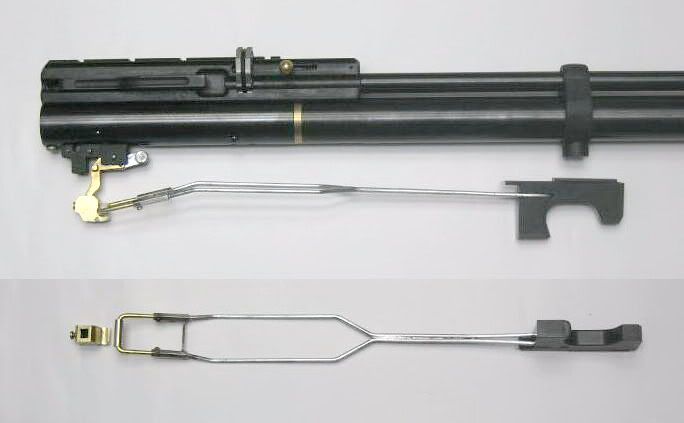
Next is the internal modification, make front cocking slot on reservoir tube, and modify hammer. The cocking and pellet probe shaft must move the same way the new cocking bar moves. The probe shaft travels about 18mm for loading pellet; then, travels about 19mm for cocking. Total is about 37mm travels. In other words, cocking distance is about 19mm, but needs 18mm more for loading pellet additionally, and hammer is only the option to change the cocking internally; Hammer#1 is striker weight, Hammer#2 is like hammer bearing bush for new cocking, Hammer#3 is the part of Hammer#1 as below:
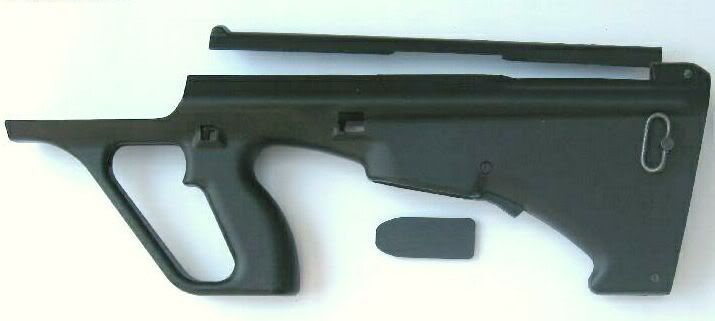
Next is AUG stock modification (simple drop-in style). http://i1138.photobucket.com/albums/n536/pegasuswing/hp1.jpg
1. Cut off the top by cylinder tube size using razor saw, filing in order to fit the cylinder body.
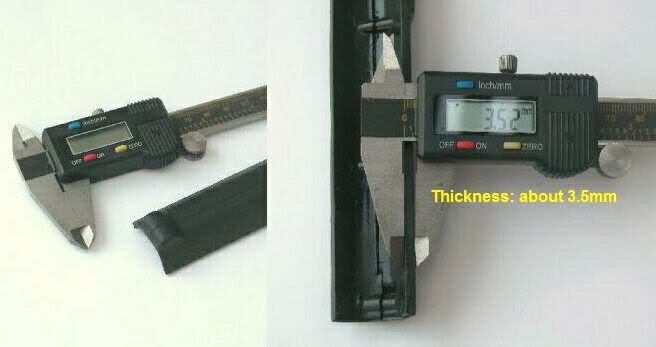
The thickness of plastic is about 3.5mm, need sharp razor saw as below;
2. Make reservoir mount plate and Mag cover.
Cut aluminum plate to meet the inside stock, with pressure gauge (if any) and installation screw holes, cut off trigger case. Then, attach plastic blocks to fit reservoir.
The mag cover must be locked by Mag release-lever. When open up pushing Mag lever, you can see pressure gauge of air cylinder and stock installation screw.

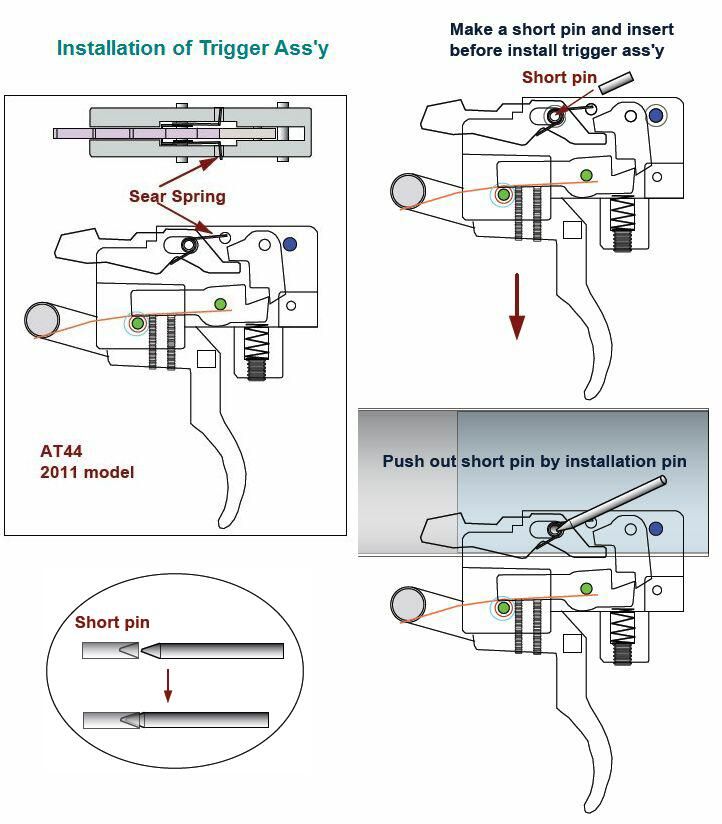
3. Trigger arm-link
Trigger adapter may be required to secure trigger-operation. I like light trigger-action, I extended the trigger catch location to a bit longer.
I made from steel wire with Hex-spacers that allow more easy adjustment (fine to rough) as well as reduce friction inside stock (smoother trigger action), and easy crafting for other PCP models.
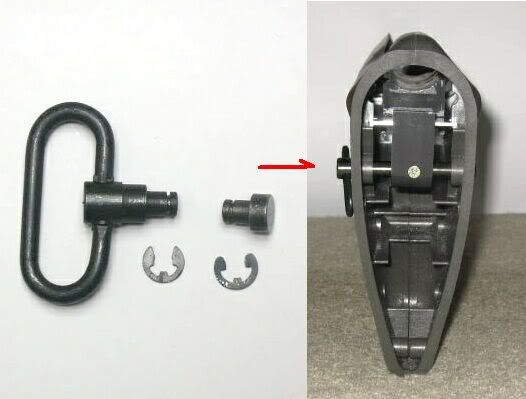
4. Sling loop with Aluminum block
Removed sling loop with E-ring, and made Sling loop shaft from brass and pass through Aluminum block to support internal reservoir mount (made from Aluminum plate and plastic blocks), in order to support reservoir more steady. Also, it became very solid feeling.
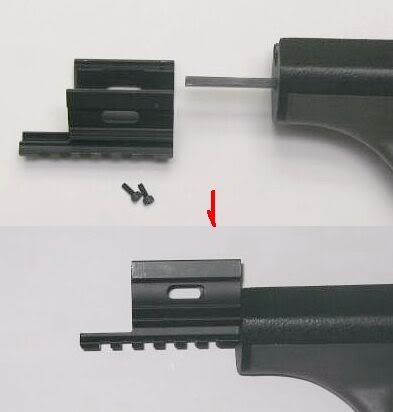
5. RIS (or Scope mount) and Cheek-rest
I inserted steel flat bar to install RIS. But, I you wish to install scope mount, do so.
The below is the cheek-rest for various type of scope and PCP models.

Later, I added felt melamine foam pad (usually uses expensive speakers), by 3M adhesive spray, which reduced the trigger and hammer sound from 69dB to 66dB.
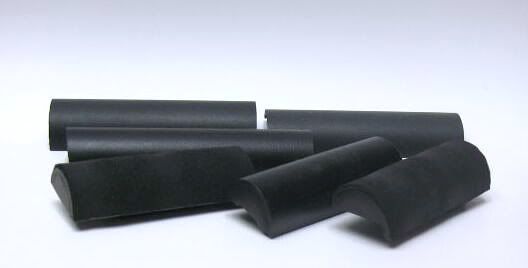
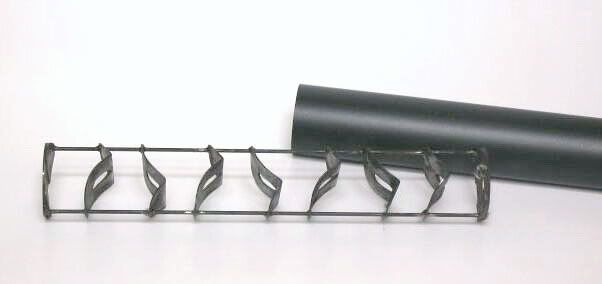
6. Effective sound reduction Shroud
I added shroud, copying from Sparrow22 (27x129mm) with sound reduction 41dB by Mfr), which means if the noise is 110dB, Sparrow22 will reduce to 69dB.
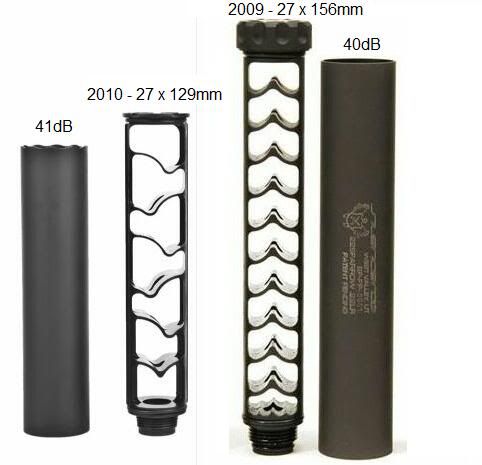
More info:
http://www.silencertalk.com/forum/viewtopic.php?f=10&t=77913&start=25
Note: This is sound reduction study academic purpose.
For more real Steyr AUG info:

http://emptormaven.com/tag/bullpup/
http://50ae.net/collection/stg556/
All Replies
Viewing 9 replies - 1 through 9 (of 9 total)

Viewing 9 replies - 1 through 9 (of 9 total)
- You must be logged in to reply to this topic.
This is an old thread, but can I purchase one of these for my air Venturi? I am very interested!!! :7: