My Variant of the Portable Pellet Trap
After looking over the instructions at http://www.instructables.com/id/Making-a-portable-Silent-Air-Gun-BBPellet-Trap, I built mine with a few modifications.
1. I use rubber mulch for its self-healing capability.

2. Paper target is attached using four ceramic magnets instead of a clipboard.
3. Used nuts, bolts and washers for assembly rather than screws.
Here is how came out…

Paper targets are placed in front. Magnets clamp the target in place against steel rails at top and bottom of the trap.
Removable frame clamps coruplast backer in front of the rubber mulch.
Steel rails mounted at the top & bottom rear of the frame allow clamping of paper targets with rectangular ceramic magnets.
Plastic frame was created from the drainage basin’s grilled cover. All the grills were cut away, leaving just the periphery and where its screws go.

Old hacksaw blades had their ends heated and bent 90 degrees to fit the width of the frame’s rear. One blade each was used at the top and bottom. Each blade overlaps the frame plastic edges so they have support along their entire length.


Coruplast backer is clamped in place by the plastic frame and two screws. Coruplast is the corrugated plastic compaign signs are often made. Slices easily with a box cutter.

Just place a paper trap in front and apply the magnets. Holds target nice and flat.
Coruplast outlasts cardboard.

All Replies
Viewing 4 replies - 1 through 4 (of 4 total)
Viewing 4 replies - 1 through 4 (of 4 total)
- You must be logged in to reply to this topic.


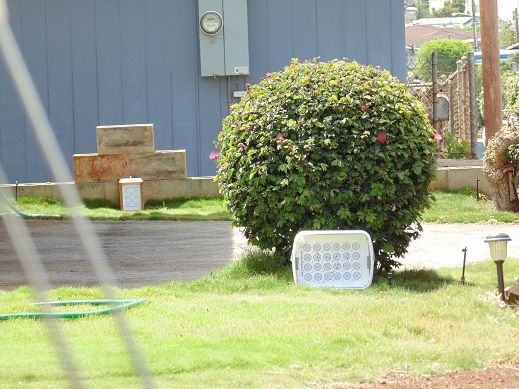
I realized I never did get back around and post picts of my stealth target. I simply used the left over 3 inch drain hardware from the main pellet trap drain box. That was packed with duct seal to absorb the pellets. A 3 inch diameter piece of corrugated plastic acts as the target surface. It’s only used for VERY low numbers of pellets when I verify scope calibration. Sits about 45 yards out and my vision can’t make out any markings on the target. Have to use binoculars to see my POI’s. I think it’s about as discrete as possible. Everyone who sees a pict of it thinks it is another of my security cameras.
Up close with my small shoes for comparison.

What about missing the target? The rise and rocks would stop any pellets, BUT my Vulcan never misses.