


Todays Blodnob/Selph testing 8/16/09
Well for those of you who didn’t see yesterdays post I installed my valve and was a bit skeptical about it. To sum it up from yesterday it was almost impossible to cock and very loud, think I was breaking the sound barrier with Kodiaks though.
Today was better and definitely a start in the right direction. I was going to try and chrony it like the original set up but it would not catch when I cocked it. So I removed Brads spring and put the factory one back in. My gun is a stock Talon SS .22 with a 12″ barrel and I just added a condor weight when I switched over to Brads valve. I shot it several times at a target and it was shooting one holers at 20 yds. and wasn’t loud at all with my GTBJay shroud a nice tinny sound. I decided to chrony it. My chrony had been acting up in the past with the dreaded err1 code so I didn’t think I would be able to get many shots over it. I was able to get it to work inside my garage. Here is a string with a fill at 3,000 psi. pw at max, figured since I had low spring pressure I would start there, and I haven’t touched the top hat and still don’t know how (come on Brad give us a pic tutoral please). Shots were with me free holding gun not benched or aiming at target (I didn’t think my chrony would work with me for that long that’s why I did it this way) 21 grain kodiaks lubed not weighed.
1-err
2-882
3-883
4-884
5-879
6-874
7-883
8-912
9-900
10-930
11-918
12-914
13-918
14-922
15-933
16-925
17-925
18-949
19-942
20-916
21-err
22-932
23-933
24-918
25-1002??
26-941
27-err
28-950
29-err
30-err
31938
32-932
33-955
34-937
35-957
36-err
37-946
38-940
39-946
40-err
41-938
42-err
43-945
44-928
45-err
46-err
47-936
48-err
49-916
50-err
51-924
52-928
53-err
54-err
55-913
56-908
57-err
58-err
59-err
60-err
61-893
62-886
63-err
64-err
65-err
66-874
When I refilled tank I could not catch how low it was pressure wise.
All Replies
Viewing 11 replies - 1 through 11 (of 11 total)


Viewing 11 replies - 1 through 11 (of 11 total)
- You must be logged in to reply to this topic.
Today was better and definitely a start in the right direction. I was going to try and chrony it like the original set up but it would not catch when I cocked it. So I removed Brads spring and put the factory one back in. My gun is a stock Talon SS .22 with a 12″ barrel and I just added a condor weight when I switched over to Brads valve. I shot it several times at a target and it was shooting one holers at 20 yds. and wasn’t loud at all with my GTBJay shroud a nice tinny sound. I decided to chrony it. My chrony had been acting up in the past with the dreaded err1 code so I didn’t think I would be able to get many shots over it. I was able to get it to work inside my garage. Here is a string with a fill at 3,000 psi. pw at max, figured since I had low spring pressure I would start there, and I haven’t touched the top hat and still don’t know how (come on Brad give us a pic tutoral please). Shots were with me free holding gun not benched or aiming at target (I didn’t think my chrony would work with me for that long that’s why I did it this way) 21 grain kodiaks lubed not weighed.
1-err
2-882
3-883
4-884
5-879
6-874
7-883
8-912
9-900
10-930
11-918
12-914
13-918
14-922
15-933
16-925
17-925
18-949
19-942
20-916
21-err
22-932
23-933
24-918
25-1002??
26-941
27-err
28-950
29-err
30-err
31938
32-932
33-955
34-937
35-957
36-err
37-946
38-940
39-946
40-err
41-938
42-err
43-945
44-928
45-err
46-err
47-936
48-err
49-916
50-err
51-924
52-928
53-err
54-err
55-913
56-908
57-err
58-err
59-err
60-err
61-893
62-886
63-err
64-err
65-err
66-874
When I refilled tank I could not catch how low it was pressure wise.
Blodnob Valve adjustment instructions.
First thing you have to realize, this is a valve that needs to be adjusted for your setup, when they were sent out they were only assembled and not adjusted, because everyone has different setups and calibers so here are the basic assembly and adjustments, after you have the valve setup remember never to adjust past the o ring engagement.
Step #1
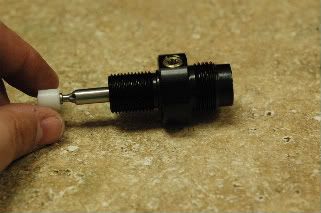
Install valve stem.
Step #2
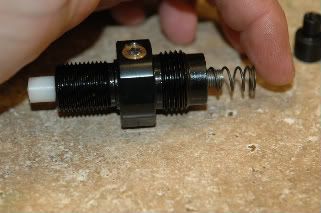
Install spring.
Step #3
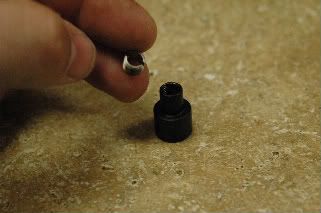
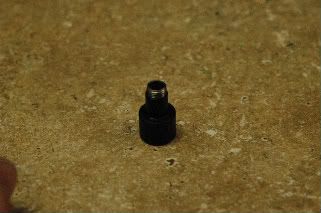
Take top hat and install set screw.
Step #4
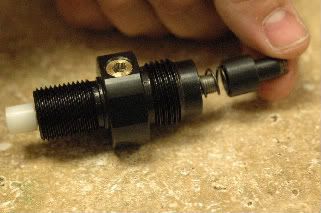
Take top hat and install it on valve stem.
Step #5
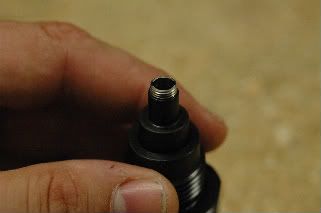
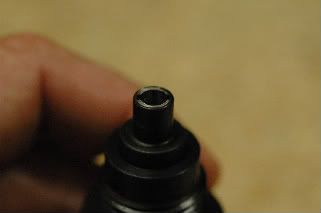
Adjust set screw until it is flush with top hat, and then screw top hat into valve until it stops on valve stem.
Step #6
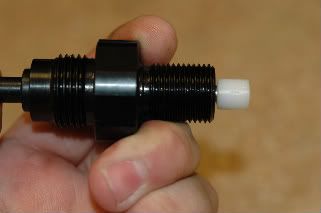
You have completed the initial adjustment and when the top hat is pressed down should look like the picture below.
Step #7
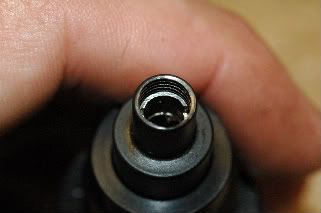
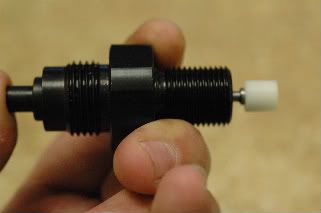
Here is a picture of how the set screw looks in the top hat when it is at full adjustment.